
I feel compelled to share a small part of my own personal hobby, mainly because I know there are others out there in similar situations. Many of you are blessed greatly by the existence in your homes of a dedicated Hobby Room; I sadly am not so gifted. In fact, with 3 kids and a wife who hog the whole house, I have little room to myself.
My solution: entrench myself in the laundry room! For me, this is actually not such a bad thing as it's surprisingly quiet and the laundry machines get little (if any) use. Honey, if you're reading this, I'm just joking :)

I think the key for any hobbyist with limited space is to use it wisely... keep what you frequently use within arms reach (neatly organized mind you) and then find organized storage for the rest. Keeping your working surface clean will add to your enjoyment when you do finally sit down to paint or model for a little while... These are all my own opinions keep in mind.
In the space behind my laundry room door, I built in the basic framework of my hobby area and it wasn't expensive. I keep everything clean and out of the way and there is plenty of space for both laundry and hobbies.
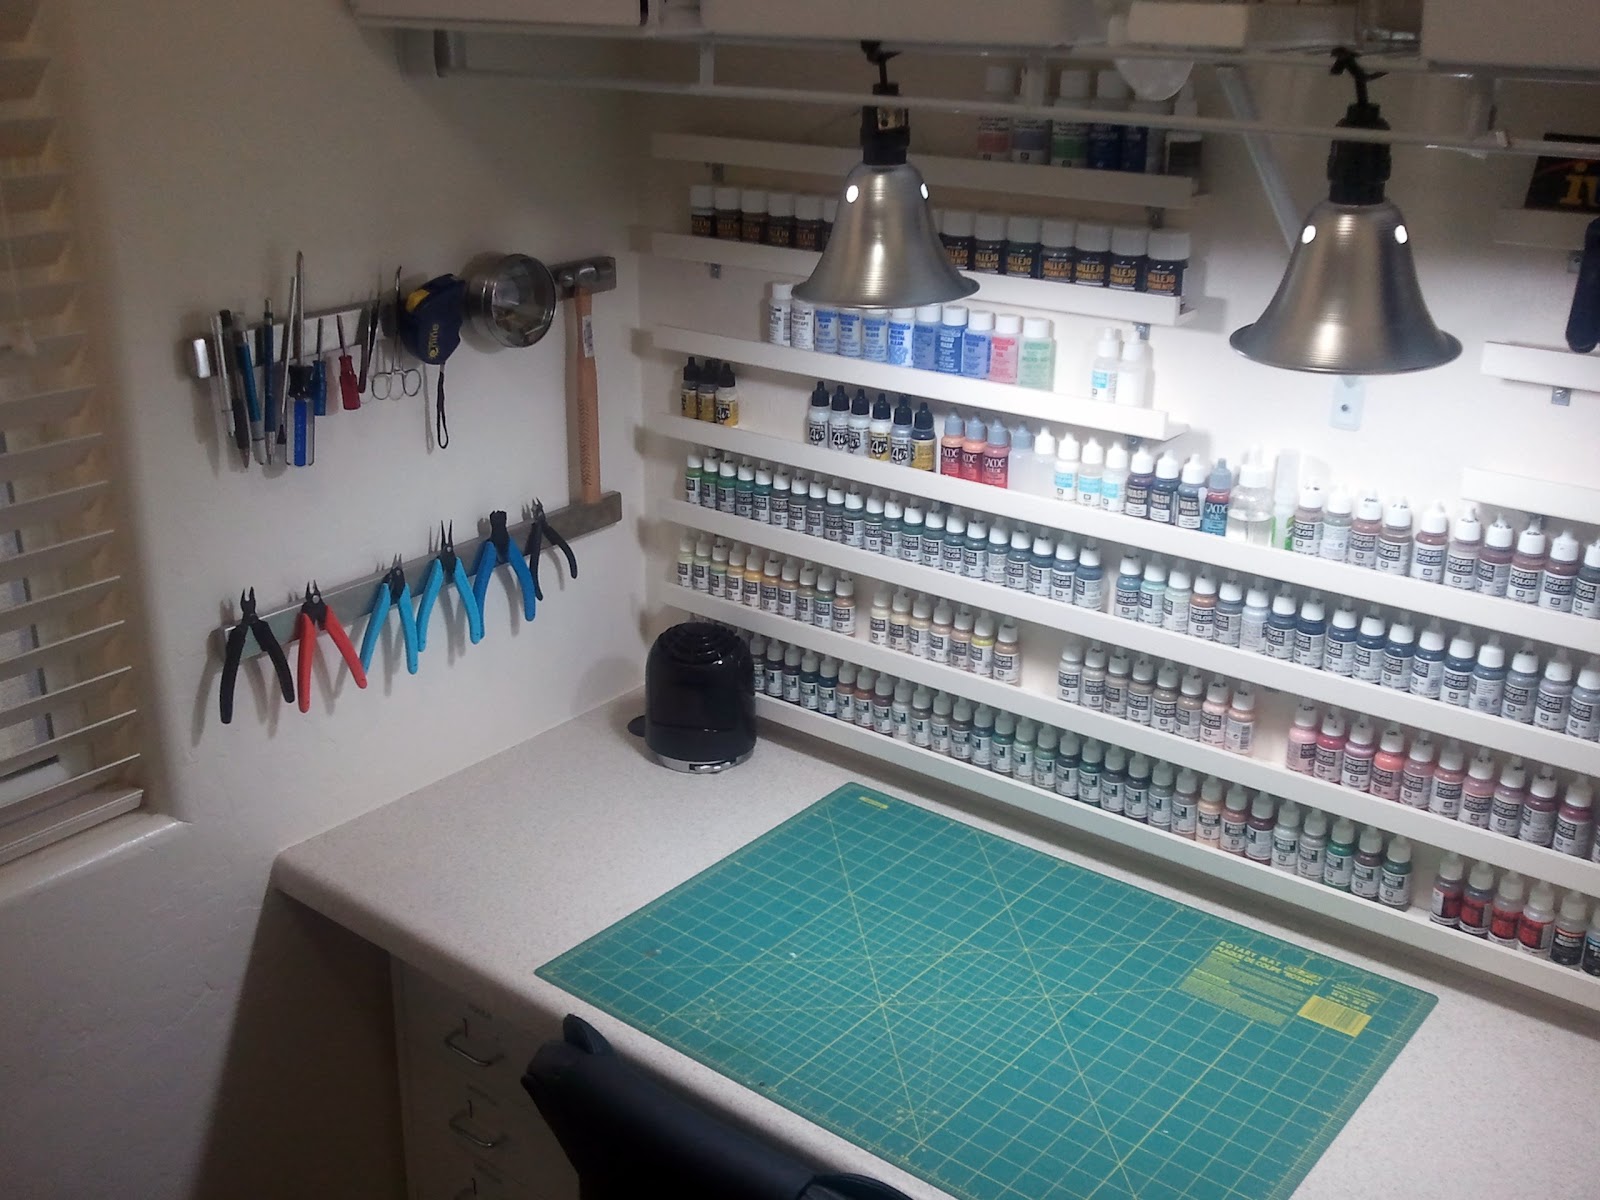
My working surface is an inexpensive Formica counter top cut to fit my wall (I got this on clearance at Home Depot for $15); it is mounted on a basic steel frame that is anchored into the wall; caulking applied to give it a finished look. This allows me to place a cheap Ikea metal cabinet underneath on one side, and my airbrush compressor on the other; still affording plenty of leg space.

My paints are stored in some basic wood-trim shelves that I easily mounted and painted. Other Items like tools, paper towels, etc. are all stored near by. The framework for my shelving and baskets are all Closet-Maid wire shelves and accessories (again, pretty inexpensive).

Lastly, all my supplies are stored in matching baskets up on top of the shelving above my counter top... out of the way so that they don't clutter up my working surface. It's clear to see when you walk in, that it's my hobby space; but when I do finally sell my house, with the baskets and paints taken down, the area looks just like a laundry folding counter top and shelves.
I look forward to the day I'll have my own hobby room to claim... but for now, I'm pretty happy.
You certainly have made the most of the available space - it looks great (important for the other crew-members) and extremely user-friendly! I'm going to copy your paint shelves; I've tried so many different things over the years and nothing works as well as those seem to.
ReplyDeleteReally love your painting style (I'm trying to copy that too - please take all my "borrowing" as admiration on my part!)
Thanks Nicholas! Everyone has their own style yet I think we all "borrow" techniques and ideas here and there. Good luck in your painting/modelling :)
ReplyDeleteBtw, I found the "paint shelves" in the baseboard and trim section at Home Depot and cut them to size, painted them the color of my walls, and then mounted them with some basic screws and brackets.
Take care!
Tanner
Yep, nice, cosy little area you have there. I need to organise myself better.
ReplyDeleteWOW this looks so cool, hope to organize mine in the future likewise.
ReplyDeleteBut I know that i never can keep it as clean like this.
Have fun with your new workspace, hope te see lot of new work being made here!
It looks great. Tidy, well organized, clean. One thing missing for me - laptop or pc for checking online sources:) But it allows for more painting less internet browsing I guess.
ReplyDeleteI very like your layout too, will stole some ideas I think.
A+ mate you must be a perfectionist.
ReplyDeleteGReg
Very tidy Tanner. I admire your collection of paints n equipment and the storage solutions.
ReplyDeleteSo does your wife tell people that you're "busy in the laundry room"? I suppose it makes a change from guys who lurk in the attic or basement, I guess I'm fortunate to be allowed a corner of the living room.
Fantastic !!! Compliments
ReplyDeleteIt's the neatest I've ever seen.
ReplyDeleteVery creative use of limited space - sometimes limited resources forces one to think a bit more and the end product tends to be better
ReplyDeleteWell done!
I think that comment of low washing machine usage might come back to haunt you...
:)
Miles
This is exactly how envision my modelling space (someday)! Great ideas, I just think that there might not be enough leg space and it'll become tiresome...
ReplyDeleteThanks guys :) I appreciate the feedback!
ReplyDeleteMiles, I agree... it's already haunting me as she's already read my post (first post she's read in 3 months) :)
I will no way show this pic to "she who must be obeyed" as she will give me no end of trouble on how tidy my set up should really be.
ReplyDeleteBut seriously thanks for sharing, it's an excellent solution.
Cheers
Yep, that is the neastest painting table I have ever seen. Hopefully my wife never sees your blog or she will be on my case to clean my desk.
ReplyDeleteThat's tremendous and inspirational. Now, I just need to do a bit of planning
ReplyDeleteMe admira la limpieza y el orden que usted practica , mi mujer estaria encanada de que yo cogiera ejemplo,y permitame felicitarle por sus vehiculos y fiuras, !UN DIEZ!
ReplyDeleteThanks everyone :) I must admit that my table is a little unorganized at them moment (sssshhhh).
ReplyDeleteMuchos gracias Alfons!
Tanner
Love this! I found your blog once before several weeks back, and I've been trying to describe the setup to my wife. I discover it again this morning and call her over... the first thing she says is "his area is SO much cleaner than yours". The good news from all of this is that I think I have her sold on the paint "shelves" now. I get to go to Lowes tonight to try to pick them out!
ReplyDeleteLOL, good to hear that this post was helpful in persuading the wife :) Once you can get her to support your hobby the sky is the limit (oh, and your bank account too!)
ReplyDeletehey I have a question, how do you shade or do the finish on the tanks? i use the army painter quick shade any ideas i use vallejo paints only,
ReplyDeletethanks -jonny
My shading is a "reverse" shading in a way. I usually spray the primer coat in a medium color and then apply the base coats in increasing lighter colors, leaving the darker colors to show on the edges. This is all done with an airbrush to get a nice smooth transition. I typically use Vallejo for all my work as well.
ReplyDeleteTanner
Hi Tanner,
ReplyDeleteI love Your works. I love them. I am trying to achieve similiar results but I am not pationate enough to try every possible way. I am using an airbrush, vallejo paints and a grey primer. MIG washes and filters. With varnishes. I bake my minis for a short drying time and smooth surface. I highlight with oils. Could You please be so kind and post step by step method used? Short. IE: 1) primer 2) base color 3)highlight 4)filters 5) gloss varnish 6)wash 7)gloss varnish 8)oil highlights ???
I would much apreciate.
Rafaell,
ReplyDeleteIt's tough to pinpoint my exact style since it changes all the time. But typically here's my tried-and-true method:
1. Airbrushed primer 2. Airbrushed basecoat 3. Airbrushed highlights 3. Glosscote 4. Wash 5. Tracks/Tools/Etc. 6. Chips/Highlights 7. Dullcote 8. Decals 9. Fading/Weathering 10. Dullcote.
That's pretty much it. Hope that helps. I try to steer away from oil based products these days but I still use Glosscote and Dullcote which I have been unable to find a suitable alternative for (that I like).
Take care,
Tanner
Very nice set up indeed. Where did you get the magnetic tool holders from?
ReplyDeleteI got them from Ikea :)
ReplyDelete