Trying Something New - PicoArmor

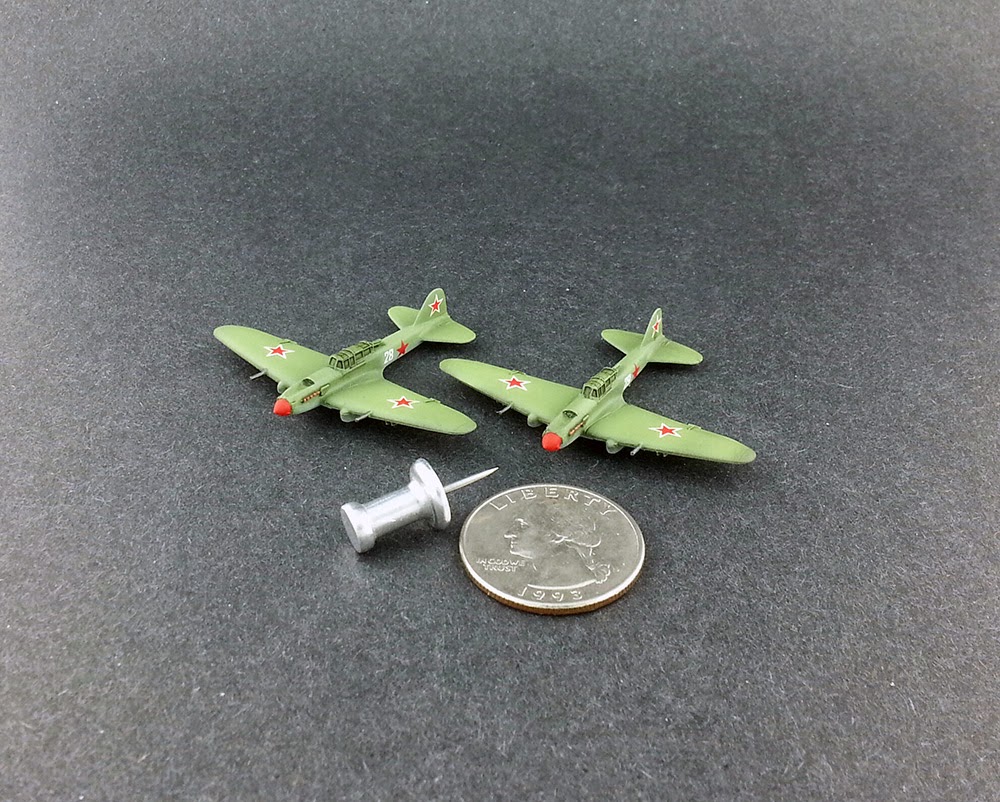
A couple of years ago I purchased some PicoArmor for a change of pace.  It's crazy small (I thought GHQ was small) and it's a very affordable Wargaming option.  This weekend I painted up a few using only a paintbrush and non-toxic paints (inlcuding matte varnish).

I'm excited to paint a few more and maybe even build a small army.  Let me know what you think.

-Tanner


One more picture...  excuse the poor lighting.  This is a great benefit of small miniatures; a full 4' x 6' game board (scaled down of course) on a single 1' x 2' Styrofoam sheet.


Royal Navy Aircraft Carriers

I'd like to share some Royal Navy Aircraft Carriers that I recently completed:  HMS Eagle, Hermes, Furious, Glorious, and Illustrious.

Let me know what you think :)  Now...  here's a dump of photos.


Recent Painting by the Boss

The past few posts have shown off some painting that my boss (wife) has done.  I've provided some color guidance, airbrush tips, and general technique advising but otherwise she's done this all on her own.
Here are the latest miniatures that she has completed; they've once again turned out very nice!  Let me know what you think.


Panzer IV F1, T-34, KV-1, and M4 Sherman


And some Flying Tanks...

Up Next... Hitler's Navy


Just wanted to post a quick teaser of my next project...

Bismarck, Gneisenau, and Prinz Eugen.  I replaced the stock masts with some brass rod (there's no way a half inch mast of GHQ Pewter would stay straight and true for more than 2 seconds!).  At any rate, I hope to have updates soon.

Tanner

3 Regia Marina Ships on eBay

For those interested, I have a new set of Italian Warships listed for sale on eBay.  You can visit the Auction Page for more details.
  • CV Aquila
  • BB Giulio Cesare
  • CA Zara


Some 1/2400 Aircraft Carriers and 1/285th Tanks

It's been a long while since I've painted anything...  so here are a few recently completed Aircraft Carriers.  These are GHQ 1/2400 and they make use of my line of deck decals.

Let's start with the Ark Royal...  pretty fancy looking ship! 


The Ark Royal helped track down the Bismarck in May 1941.


Only to be sunk by a U-Boat torpedo in November that year.


Here is the Italian Carrier Aquila.


She was never completed and eventually scrapped in the early 50's.  So this deck pattern is purely speculation :)


The Imperial Japanese Navy's first carrier was the "Hosho".


And she actually survived the War.  Although due to her outdated design, she really didn't see much action.


And when you compare her to the Ark Royal and Aquila...  you can see she was a pretty small Carrier.


Now...  the real show begins.  If you saw my post from a few weeks ago, you noticed that my wife can paint miniatures; infantry in particular.  This past week she gave some Soviet and German armor a try...  and they turned out awesome!


Panther D...


Panther A and D's...


Same vehicles from a slightly lower angle.


Soviet T-34/85's...


At a lower angle.


I have to say that I am very impressed with my wife's abilities.  She's interested in painting some terrain (buildings), Aircraft, and even 1/2400 Naval Vessels; so more photos will be coming soon!

Thanks for visiting!
Tanner

Do It Yourself Vallejo Paint Rack

Over the past few years, I've been asked a few times what I use for keeping my model paints organized.  If you've read my "Painting Room" Article, you know what I've used in the past.  Now that I am in my new house and I have a dedicated room, I have essentially taken the same route for my paint organization.  It is sturdy, looks nice, and is relatively inexpensive to make.


I start by using strips of pine corner molding from Home Depot; you can find it near the baseboard and edging aisles.  It is roughly 2 inches wide with a 1 inch lip.  It runs around $1.50 per linear foot; it's not the cheapest solution around but I have yet to find something that I like better.


In the cabinet/hardware aisle, you can find 3/4 inch elbow brackets, 1/2 inch screws and bolts, and a box of drywall anchors.  That's all you need to mount your shelves.


I cut my "shelves" to my desired length and marked off where I wanted to mount them on the wall.  I also painted them to match my wall color (except in semi-gloss).


Each shelf was mounted onto the elbow bracket using flush screws.  The underside of the elbow bracket was mounted to the wall using a drywall anchor.  The shelves are very sturdy and the anchors hold them very tight up against the wall.


I placed a mounting bracket every foot or so, although you likely could get away with less.  I like everything to look clean and symmetrical :)  The other nice feature of these shelves is that they are wide enough to fit most any paint bottles...  Vallejo, Tamiya (haven't tried large Tamiya bottles though), Testors, and Vallejo auxiliary bottles.


I am now able to keep my paints at hand and still be very organized and clean.  For me, painting and modelling is much more enjoyable in an organized and clean environment.  My desk is in, my cabinets are in, my painting racks are in, and my lighing is in...  All I need to finish is the flooring and a my airbrush area in the garage!
Related Posts Plugin for WordPress, Blogger...