Showing posts with label Hobby Talk. Show all posts

Taking a Break... Back Surgery


It's been a few months since I've posted any new work.  In fact, I think I've had only 1 or 2 posts in the past year.  This has been due to a heavy schedule and also chronic back problems that have plagued me for the past several years.

This reduction in posts is going to continue for awhile and perhaps will drastically change my ability to enjoy this hobby.  A few weeks ago, I underwent back surgery as these chronic issues escalated and I began to lose feeling and muscle function in my leg and foot.  Surgery went well and I'll be spending the next few months trying to become a new man.

If any of you have experienced something similar and have found a way to enjoy this hobby AFTER something like back surgery, let me know...  I'm interested in hearing how you did it.  I read and watch many of your blogs and websites, I'll be continuing to do that as I find it very enjoyable!

Take Care!
Tanner


Lots of Hobby Items on eBay!!! GHQ, CinC, and Airbrushes.

I'm on vacation this week and I've been doing some re-organizing of my hobby space.  There are lots of items that I have barely used and/or may never use or paint.  As a result, I've posted quite a few very nice hobby items on eBay at steep discounts.  Swing by and check them out if you're interested.

WWIICentral on eBay

For example...  Airbrushes:


GHQ and CinC Blister Packs:


And a few other items...

Hope you all are having a nice summer :)

Do It Yourself Vallejo Paint Rack

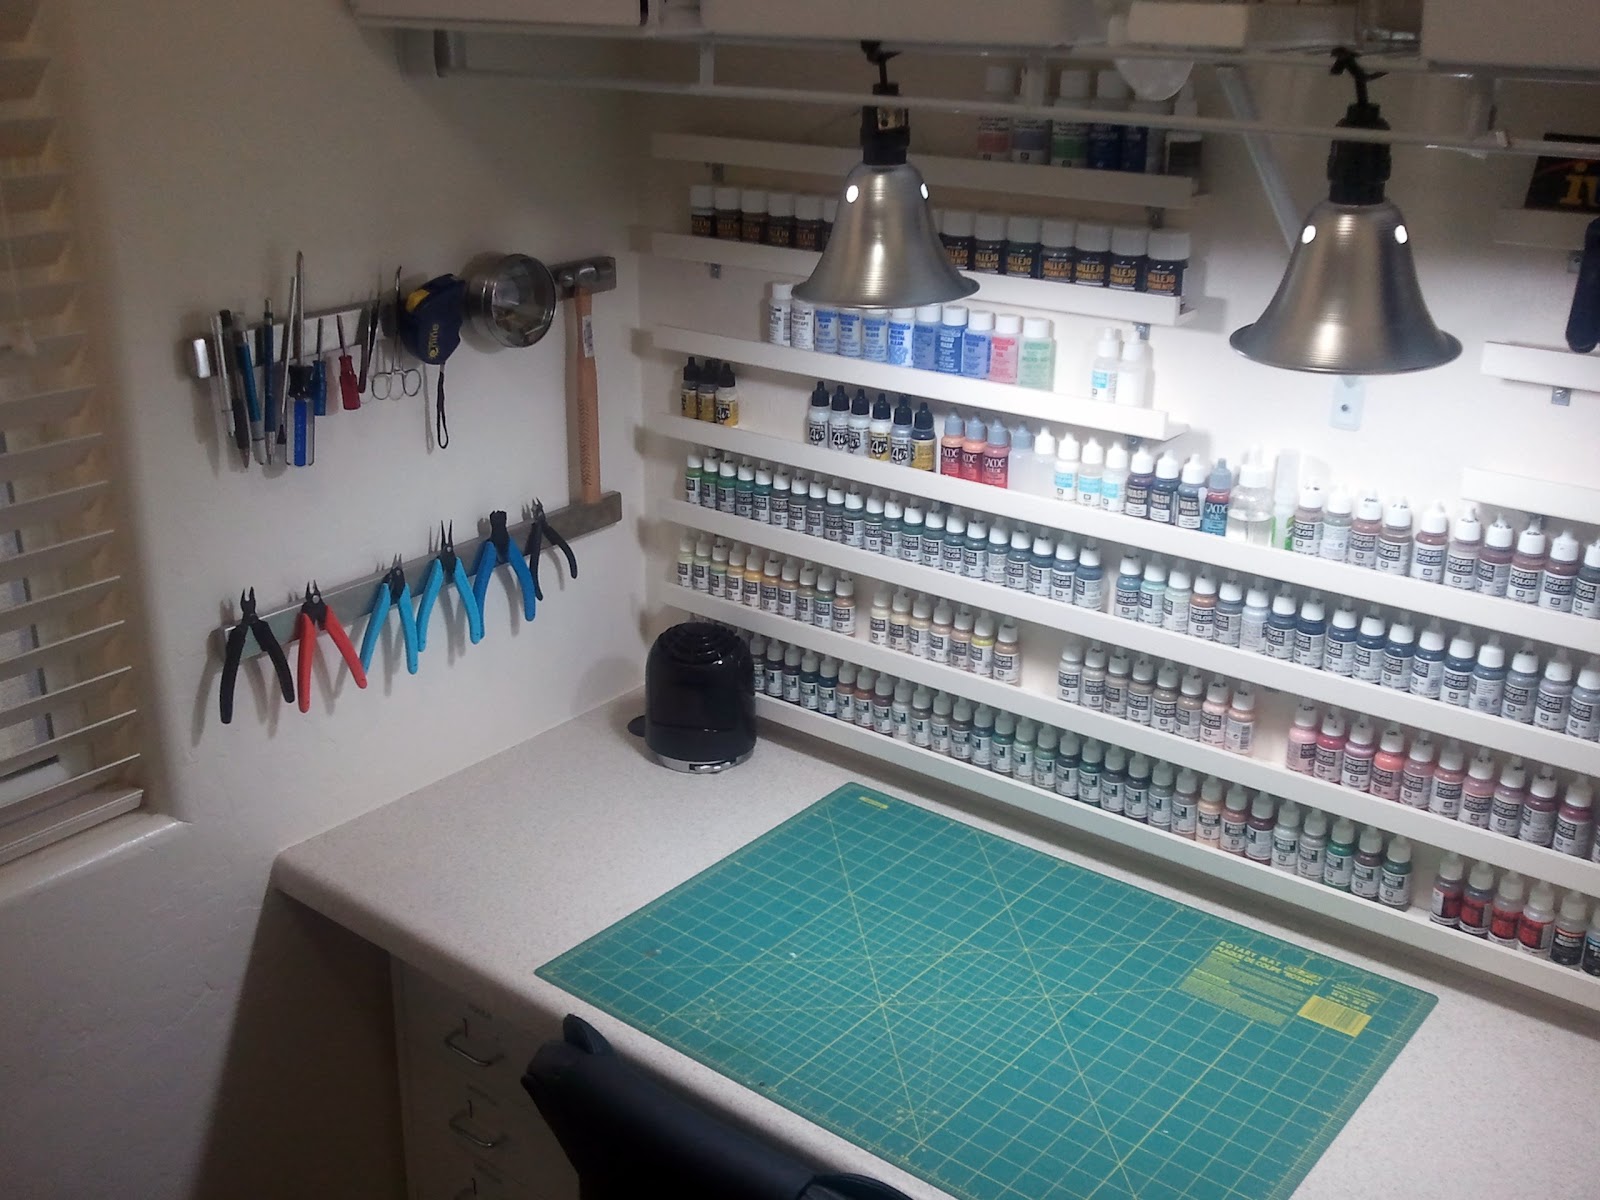
Over the past few years, I've been asked a few times what I use for keeping my model paints organized.  If you've read my "Painting Room" Article, you know what I've used in the past.  Now that I am in my new house and I have a dedicated room, I have essentially taken the same route for my paint organization.  It is sturdy, looks nice, and is relatively inexpensive to make.


I start by using strips of pine corner molding from Home Depot; you can find it near the baseboard and edging aisles.  It is roughly 2 inches wide with a 1 inch lip.  It runs around $1.50 per linear foot; it's not the cheapest solution around but I have yet to find something that I like better.


In the cabinet/hardware aisle, you can find 3/4 inch elbow brackets, 1/2 inch screws and bolts, and a box of drywall anchors.  That's all you need to mount your shelves.


I cut my "shelves" to my desired length and marked off where I wanted to mount them on the wall.  I also painted them to match my wall color (except in semi-gloss).


Each shelf was mounted onto the elbow bracket using flush screws.  The underside of the elbow bracket was mounted to the wall using a drywall anchor.  The shelves are very sturdy and the anchors hold them very tight up against the wall.


I placed a mounting bracket every foot or so, although you likely could get away with less.  I like everything to look clean and symmetrical :)  The other nice feature of these shelves is that they are wide enough to fit most any paint bottles...  Vallejo, Tamiya (haven't tried large Tamiya bottles though), Testors, and Vallejo auxiliary bottles.


I am now able to keep my paints at hand and still be very organized and clean.  For me, painting and modelling is much more enjoyable in an organized and clean environment.  My desk is in, my cabinets are in, my painting racks are in, and my lighing is in...  All I need to finish is the flooring and a my airbrush area in the garage!

My Painting Room... er, Corner. Hope for those in tight places.

I feel compelled to share a small part of my own personal hobby, mainly because I know there are others out there in similar situations.  Many of you are blessed greatly by the existence in your homes of a dedicated Hobby Room; I sadly am not so gifted.  In fact, with 3 kids and a wife who hog the whole house, I have little room to myself.

My solution:  entrench myself in the laundry room!  For me, this is actually not such a bad thing as it's surprisingly quiet and the laundry machines get little (if any) use.  Honey, if you're reading this, I'm just joking :)


I think the key for any hobbyist with limited space is to use it wisely...  keep what you frequently use within arms reach (neatly organized mind you) and then find organized storage for the rest.  Keeping your working surface clean will add to your enjoyment when you do finally sit down to paint or model for a little while...  These are all my own opinions keep in mind.

In the space behind my laundry room door, I built in the basic framework of my hobby area and it wasn't expensive.  I keep everything clean and out of the way and there is plenty of space for both laundry and hobbies.


My working surface is an inexpensive Formica counter top cut to fit my wall (I got this on clearance at Home Depot for $15); it is mounted on a basic steel frame that is anchored into the wall; caulking applied to give it a finished look.  This allows me to place a cheap Ikea metal cabinet underneath on one side, and my airbrush compressor on the other; still affording plenty of leg space.


My paints are stored in some basic wood-trim shelves that I easily mounted and painted.  Other Items like tools, paper towels, etc. are all stored near by.  The framework for my shelving and baskets are all Closet-Maid wire shelves and accessories (again, pretty inexpensive).


Lastly, all my supplies are stored in matching baskets up on top of the shelving above my counter top...  out of the way so that they don't clutter up my working surface.  It's clear to see when you walk in, that it's my hobby space; but when I do finally sell my house, with the baskets and paints taken down, the area looks just like a laundry folding counter top and shelves.

I look forward to the day I'll have my own hobby room to claim...  but for now, I'm pretty happy.

Plastic Soldier Company Panzer IV Sneak Peek

Hopefully you've all seen the 15mm Plastic Soldier Company T-34 that I recently finished; it was enjoyable to paint and I've been anxious to see what's up next from PSC.  I was talking with Will at The Plastic Soldier Company yesterday and he was kind enough to share these diagrams with me that detail his next up armor release for both 15mm and 1/72.  It sounds like the 15mm box is planned for April and the 1/72 in May.  I'm really looking forward to picking up a few boxes.

I don't know a whole lot about these yet but I think the pictures speak for themselves!  In my opinion, this is great news.  Be sure to checkout The Plastic Soldier Company at their website.  Thanks for sharing these pictures Will!


PLASTICS!!! 1/72 Plastic Kits

Wow...  I think I jumped into 1/72 scale with both feet this past week.  Lately I've been in a bit of a plastics craze I think and I stumbled upon several 1/72 model kits and purchased quite a bit.  The picture at the left is just the buildings I picked up; I have several armor kits and infantry platoons somewhere in the mail.

...Sssshhh, don't tell the wife...

I've always been well aware of 1/72 (20mm for others) but I never really explored what was available.  I was surprised to find several kits that interested me keenly and I splurged.  Pegasus Hobbies makes several items for Eastern Front and Italeri has quite a few buildings that look great as well!  To be truthful, I've never been as much into the wargaming aspect of historical miniatures as much as the painting.  I've never liked assembling complicated kits either...  I'm hoping that these kits will give me an excellent balance between detail/accuracy and easy assembly; and at the same time give me a chance to paint and game a little when I get the urge.

I'll be sure to update with pictures and projects as I progress through painting these kits and I'm looking forward to painting something bigger than 1/285 and 15mm for a change.  If anyone has good recommendations for resources on 1/72 please comment, I'd love to hear the feedback.

Stay tuned...
Related Posts Plugin for WordPress, Blogger...